Welcome to the first post of my ‘UX Building’ series. In this blog post, I want to take you on a journey of how my blog came to be. The desire to embark on this journey was driven by my passion for being a part of the global discourse on User Experience (UX), so here I am!
What content can you expect from the UX Building series?
- In-depth case studies on the research, design and development aspects of UX
- Opinion pieces on various topics surrounding UX
- Practical guides to enhance your skills
- Resources to help make you the best UX professional you can be!
The blog will evolve to include more functionality as I produce more content. I will also open the comments so you can participate in the conversation, and I may even invite some guest bloggers to contribute their own posts.
If you are a UX Designer, Researcher, Developer or just interested in the world of product design, make sure you sign up for my newsletter (coming soon).
Through these blogs, I aim to share my knowledge and expertise while continuously learning and growing alongside my readers. Let us dive in!
Setting up
Hosting
I first needed a hosting provider to get my blog up and running. WordPress is a self-hosted blogging platform that needs to be installed somewhere.
I am grateful that the team at Elcap Agency have gifted me with some space on their server. Usually, I would need to arrange my hosting environment using a self-hosted platform.
Most hosting providers allow for an easy ‘one-click’ install of WordPress, which saves me the trouble of configuring it by myself (which is excellent for somebody like me).
Here are some great hosting providers that I have used for my WordPress projects:
Do not forget that you will need a domain name. The providers listed above allow you to set up and configure your domain name.
Finding a theme
Once I had my WordPress environment set up, I needed a theme. A theme is essentially a set of files that changes how your site looks and feels.
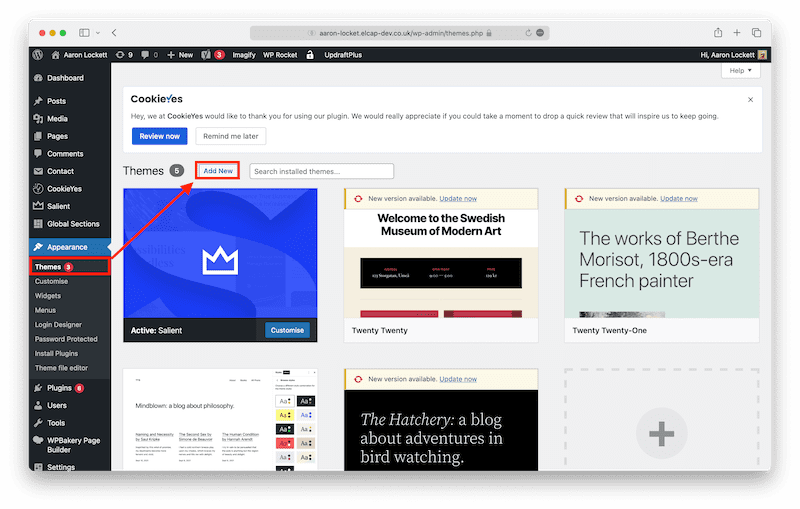
Adding a new theme via the admin panel
When you are tight on a budget and do not necessarily have the time or the skills yourself to build a custom website, themes come in handy.
I chose a theme called Salient, which is highly rated by the WordPress community. It has many great options in terms of pre-built layouts and extensive customisation options.
It is continuously updated, and the developer support is some of the best I have seen in the market.
To figure out how to pick a suitable theme for your website, consider reading Selecting the Perfect WordPress Theme – 9 Things to Consider.
You can also browse WordPress themes on ThemeForest
Relationship between front and backend
The relationship between the front and backend is essential to understand when building a WordPress blog.
The frontend deals with the visual aspects a regular user would see when viewing the website:
- User interface
- Layout and design
- The overall appearance of the website
- HTML, CSS, and JavaScript
- WordPress template tags and functions
- Themes and templates
- Widgets
The backend handles things such as data and functionality:
- Server-side of the website
- Data and functionality
- WordPress CMS (Content Management System)
- Database that stores all the data for your website
- WordPress API (Application Programming Interface)
- Plugins and APIs
- Access to data stored in the database and the ability to modify it.
From the WordPress Content Management System (CMS), we have the ability to add, edit and publish content, change the appearance of our website, control key settings and install plugins to provide added functionality without the need for a developer.
Once a theme is chosen, you need to modify the frontend to your preference. Not only can I pick how the layout appears on the homepage, but I also control global elements such as typography and colours.
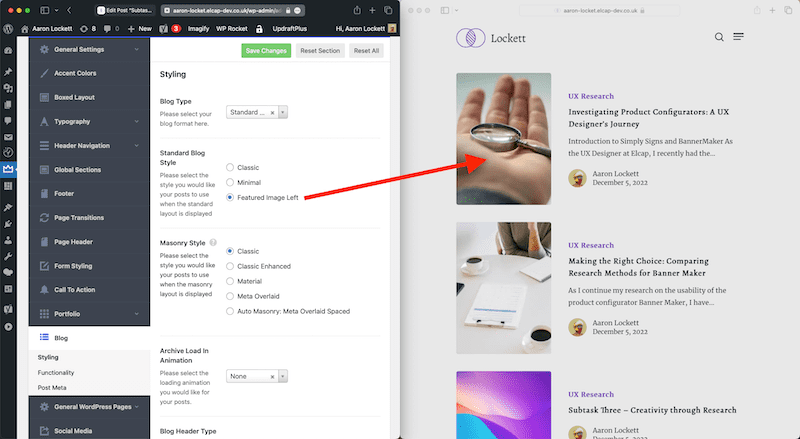
Salient theme settings
Plugins are third party software that can be installed on a WordPress website to bring additional functionality. Here are some of the main plugins I’m using on this blog:
Contact form 7 is a plugin that lets website owners create their contact forms. It is one of the most simple contact form plugins, but I consider it the best due to its flexibility. It is also completely free! Other plugins on the market have more and better features, so if you want to find the right contact form plugin for you, read the article on the 5 Best Contact Form Plugins for WordPress Compared (2023)
WP Rocket is a premium optimisation plugin. There is no wonder why this plugin is so popular. This plugin offers all the essential tools you need to speed up a WordPress website, such as file optimisation, caching and database cleanup. Best of all, it has a great user experience for admins who do not have the technical knowledge of the backend of WordPress.
Read this WP Rocket Review – Is It Really the Best WordPress Caching Plugin?
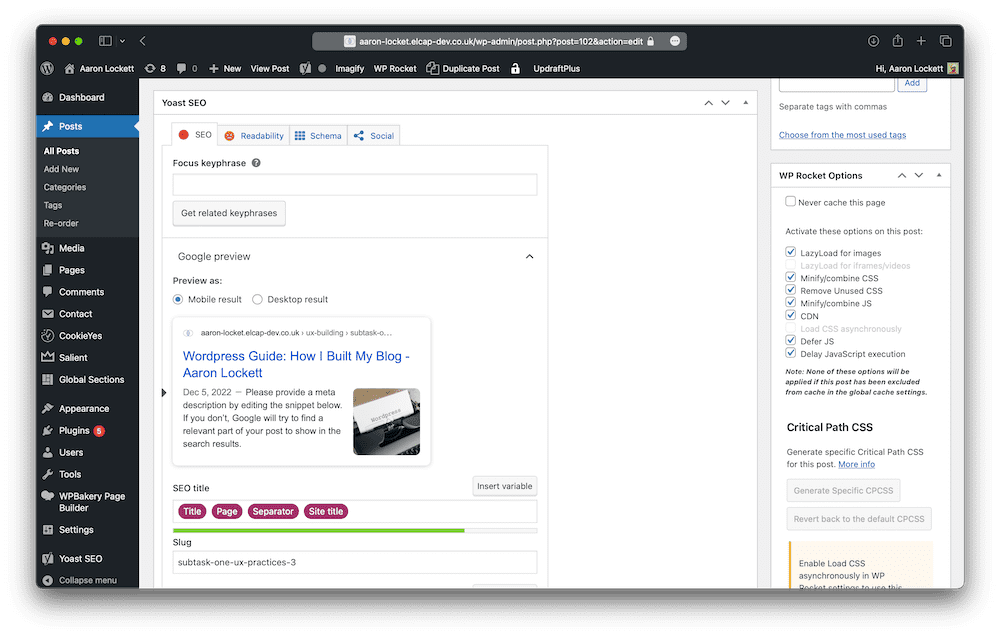
Yoast SEO provides the tools to optimise your WordPress content for search engines such as Google. On each page or post, you can find the Yoast settings at the bottom, where you can edit the slug and meta description. You can also target for specific keywords to see if your content is targeted correctly.
- Yoast settings within the page editor
How my blog building decisions affect the readers’ user experience
Building a blog can be exciting, we can get carried away with making the blog look nice. Sometimes, we forget how our blog building decisions can negatively affect the users. Here are some of the things I considered when building my blog.
Speed performance
Slow load times cause visitors to leave websites, so it is important to make sure our websites are optimised. By using a tools like Google PageSpeed Insights and GTmetrix, we can identify the problems causing slow load times.
Some of the main culprits of long load times are:
- unoptimised images
- bloated html css and javascript files
- poor server performance
I will show you how I optimised my blog using WP Rocket. It is one of the best plugins to use for website optimisation and includes features such as file optimisation, database cleanup and caching.
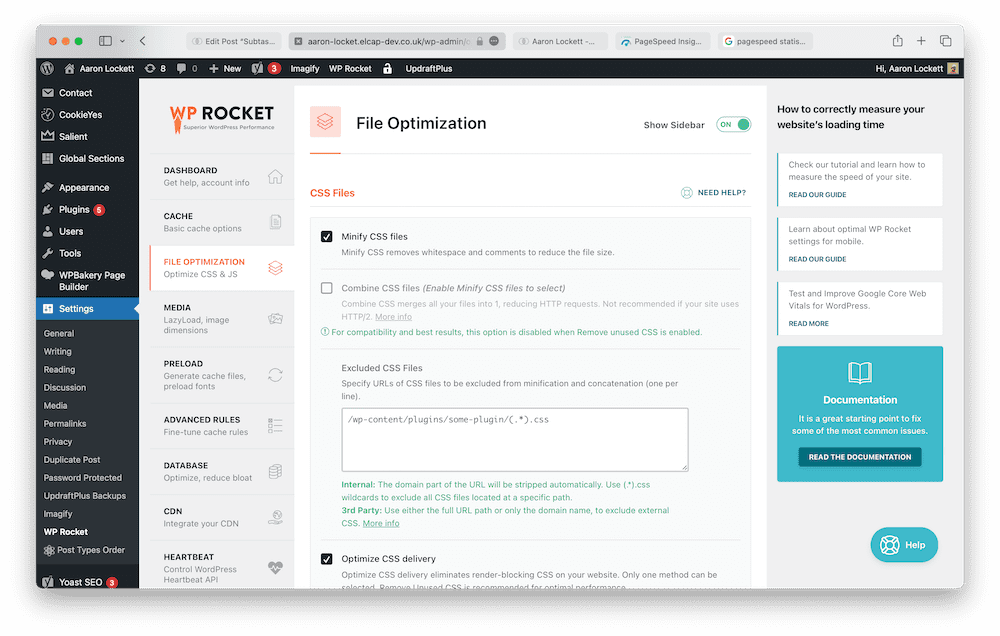
I optimised the files on my WordPress site by minifying code files. Minification can dramatically improve site speed by removing unused code, white space and comments within the code.
Another way to optimise files is by delaying the execution of JavaScript. Within WP Rocket, we can enable the setting called ‘Delay JavaScript Execution’ which will delay the files from loading until there is a user interaction (such as moving the mouse). This way, all the HTML and CSS files which are used to display content are loaded first.
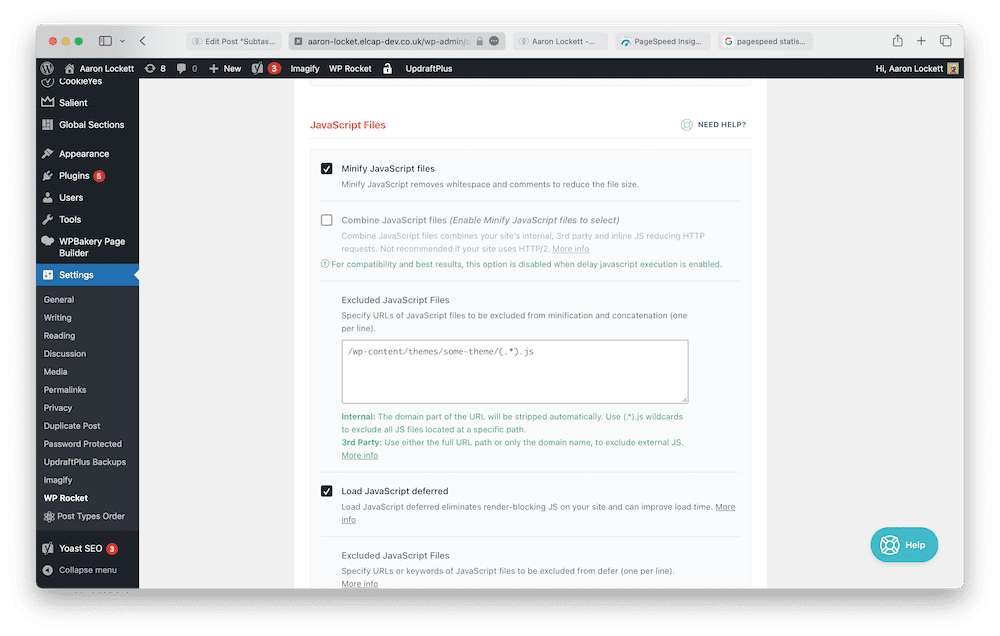
Delaying JavaScript execution setting
Another important aspect of optimisation to discuss is images. Often, I find clients add images to their websites without considering the file size or format. As a general rule, JPG format should be used for pictures and PNGs for graphics (such as illustrations or icons). WebP is another format which can significantly reduce image file size without sacrificing quality.
Learn more about image optimisation: How to Optimise Images for Web Performance without Losing Quality
The publisher user experience
Many blogs invite collaborators to contribute pieces of content. I intend to ask colleagues and other key opinion leaders in the UX space to provide content of their own. To do this, I will need to enable them to log into the CMS, add new and edit posts.
How can we make the CMS a seamless experience for these users?
The WordPress CMS can become cluttered with so many settings and options, which makes it difficult for someone who only needs access to publish content. In essence, a contributor only needs to see the options relevant to them.
When adding a new user, WordPress offers user roles we can assign to limit what access a certain user has.
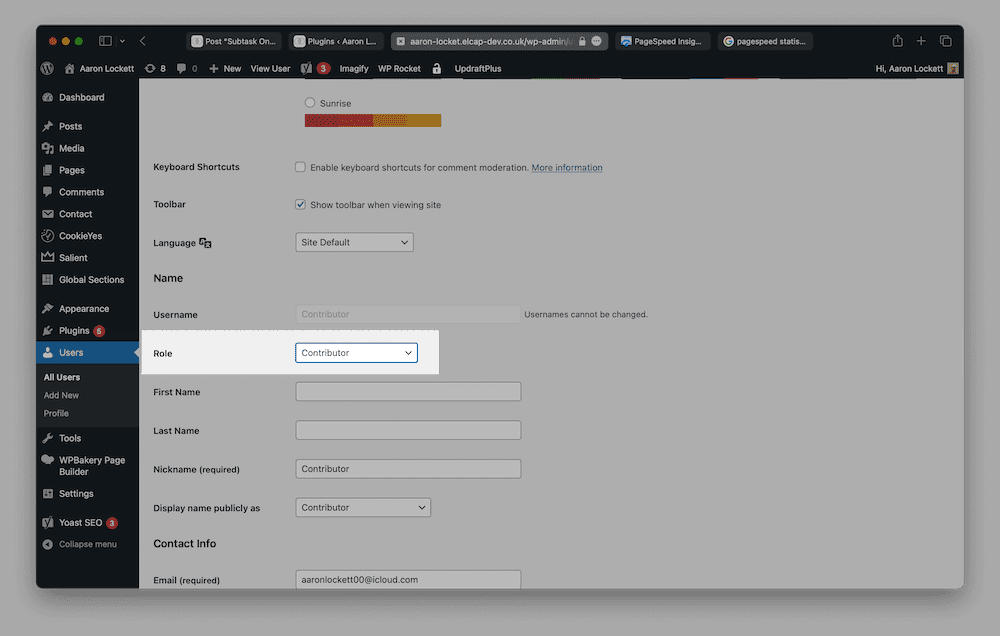
User role options with the WordPress CMS
Assigning the appropriate user role to contributors improves the publishing user experience by simplifying user interface. It also mitigates the risk of your contributors to change something they shouldn’t. Security issues can also arise when contributors have access to things such as the contact forms, which runs the risk of a data breach.
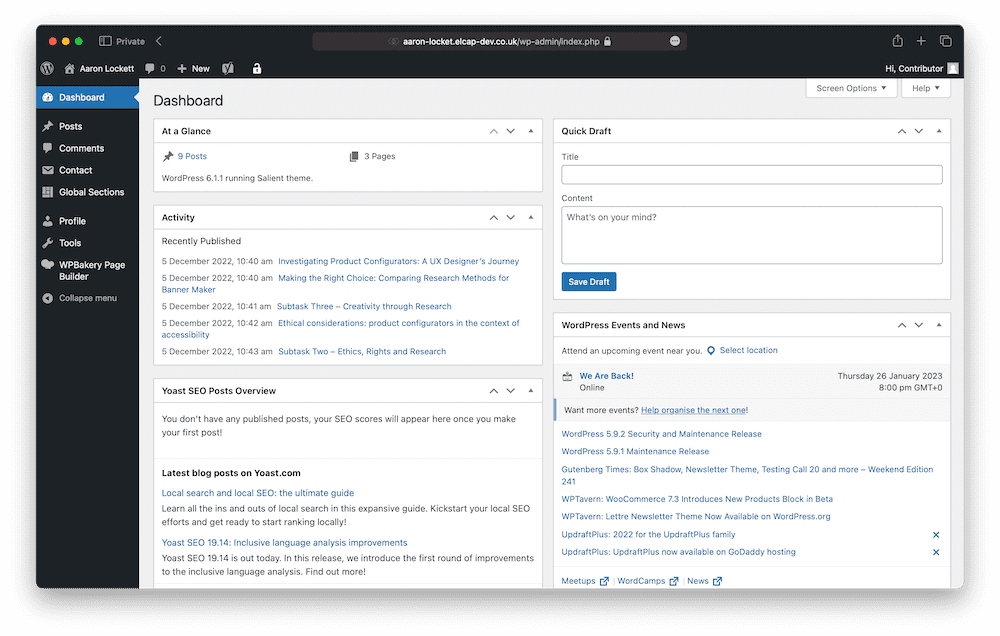
Contributor view within the WordPress CMS
Sometimes, WordPress’s default user role options aren’t exactly what we want. We may wish to provide them with more or fewer options depending on their specific needs. We can use a plugin such as User Role Editor to get more granular and customise the options.
For example, the ‘contributor’ user role allows access to the contact forms by default, allowing them to create, edit and delete contact forms. As the admin, only I should be able to have control over the forms. We can use User Role Editor to restrict this specific panel.
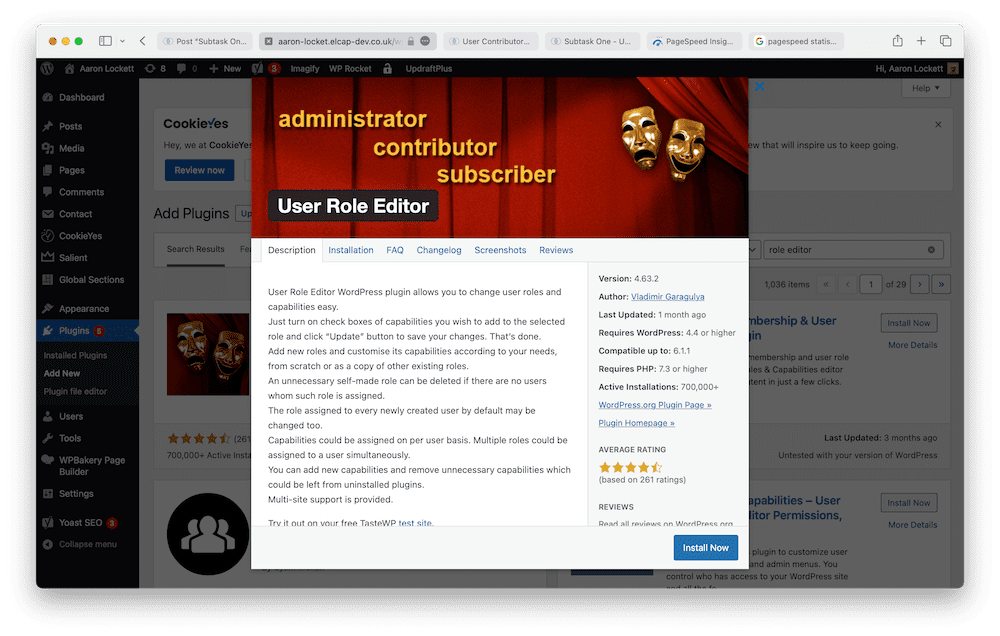
The User Role Editor plugin
Application programming interfaces (APIs)
One of the key features that make WordPress so great is its ability to integrate with APIs (Application programming interfaces). In short, APIs allow different systems to communicate with each other.
Businesses tend to include a map of their office location on their website, which is why the Google Maps API is a popular API for WordPress websites. It allows the developer to provide directions to their office at a click of a button and display location-based data.
See this example of Google Maps API in action:
HotJar API
If you are a UX Designer, being able to produce reports based on real-world usage of your blog website is fundamental to continuously improving the user experience.
The HotJar API lets us connect our WordPress website to HotJar heat maps and behaviour analytics tools. By recording each visit from the users, we can see how they interact with the website, what buttons they click on, where they scroll and where they drop off.

Source: https://www.hotjar.com/heatmaps/examples/
Additionally, HotJar also offers the ability to conduct user surveys and collect feedback from visitors straight from the website.
Read more on the features of HotJar
Social media APIs
One additional example of APIs are ones that interact with social media websites, such as Twitter, Instagram or Facebook API. When integrated, they allow for our WordPress website to interact and pull information.
One example of a Twitter API in action is the ability to display a feed of tweets. This ability allows us to promote our social media channels to the people who visit.
With Facebook API, we can publish posts on our WordPress blog that are shared directly to the Facebook account, saving time on republishing.
Read this guide on ‘How to Add Your Social Media Feeds to WordPress (Step by Step)
WordPress Security
Adding security measures to any website is crucial to defending against malware, brute force and other hacking attempts. Here are a few steps I have taken to secure my blog using the free version of WordFence:
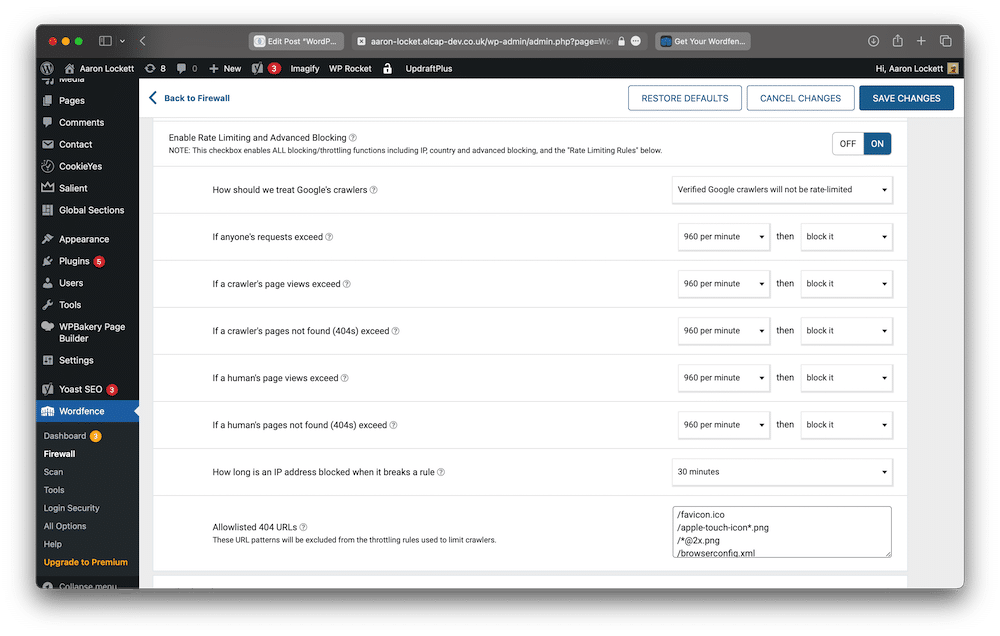
Rate limiting regulates the number of times any user or bot can send a request to a page, post, or other files on your site.
By setting the limit on requests and applying a rule of blocking IP addresses that exceed the limits, I am preventing a vulnerability that malicious users could take advantage of.
- Security settings within WordFence
Since multiple people will have access to my blog to publish content, I must take login security as another risk to mitigate. Passwords have the potential to become compromised, so by adding 2 Factor Authentication, we apply a second layer of defence to the blog. 2FA forces the user to click a link on an email, type in a code from a mobile device or use backup codes.
- The WordPress Login Screen
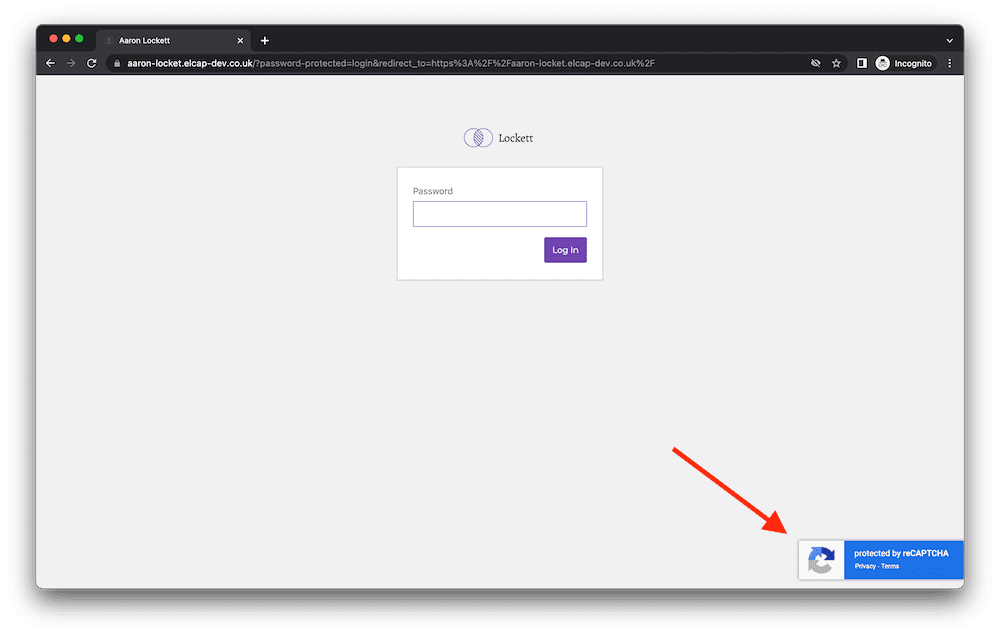
I have also included ReCaptcha V3 to the login screen, which deters bots by reading users’ mouse activity to determine whether that user is an actual human or a bot.
Learn more about ReCaptcha here
Read more about the features and functionality WordFence provides.


